Christian Brothers Automotive Family Recipes
.jpg)
Whip up an amazing Thanksgiving dinner with these family recipes provided by team members from our headquarters at Christian Brothers Automotive.
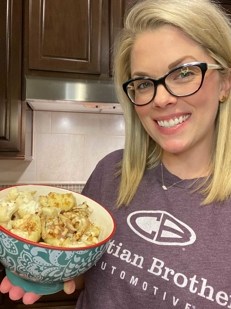
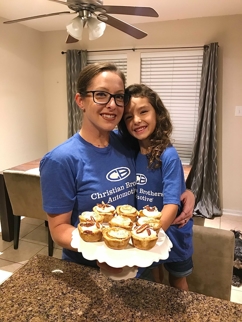
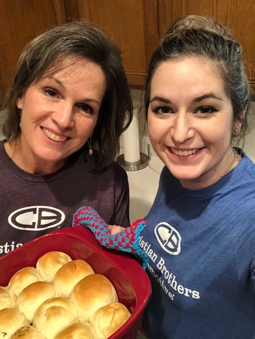
Kristin from our Operations Coaching team shares her beloved side-dish called, “The Good Cauliflower”. Chris in Recruiting shares his family’s favorite dessert, Mini Pumpkin Pies. And finally, a feast is not complete without “Mom’s Dinner Rolls”, shared by Jessica from our New Store Training crew. Bon-Appetit!
Kristin’s “The Good Cauliflower”

The Good Cauliflower Ingredients
1 large cauliflower head, cut into florets
1 shallot, sliced into thin pieces
¼ cup shitake mushrooms, stems removed and sliced into thin pieces
¼ cup pine nuts
1 T olive oil
1 T truffle-infused olive oil
2 t Coconut oil
Salt and Pepper
Red Pepper flakes
How to make:
- Place a large skillet onto your stovetop and turn to medium-high heat
- Once the skillet is hot (you should be able to wave your hand over the top of the skillet and feel the heat radiating off the skillet) pour in the olive oil and truffle-infused olive oil
- Lift the skillet by the handle and maneuver the oil around until the pan is covered, wait 30 seconds
- Toss in all of the cauliflower florets, season with salt and pepper, then with a spatula you will stir the cauliflower until it is evenly coated with oil
- Cook until cauliflower is golden brown, about 10-15 minutes. Set aside.
- Gently and carefully wipe most of the oil out of the pan and place it back on the stovetop at medium-high heat
- Add in the coconut oil and wait until it has melted
- Once the coconut oil is melted, add in the shallot and shitake mushrooms and cook until tender, about 4 minutes
- Add in the pine nuts and allow the mixture to cook for 1 more minute
- Add the cauliflower back into the pan, stir, then add in a few sprinkles of red pepper flakes to your heat preference
- Enjoy!
Chris: Mini Pumpkin Pies

Start by making the pie crust
2 1/2 cups Flour
1 Tbsp sugar
1 tsp table salt
2 Sticks unsalted butter, cut into chunks and kept very cold before using
1/2-3/4 VERY cold water (I add ice to my measuring cup)
- Measure the flour into a large, wide bowl. Whisk in the sugar and salt. Toss in butter cubes and coat them with the flour. Using a pastry cutter (or a fork also works fine) cut the butter into the flour mixture until it resembles crumbs.
- Use a Tablespoon to slowly add in your cold water. I like to start with three tablespoons at a time. Use your pastry cutter or spoon to mixture the water into the dough. Repeat this process until your dough comes together and is soft and no longer dry. Form into a ball.
- At this point, you can wrap in cling wrap and store in the fridge or you can begin rolling out to make your pies.
How to make the pumpkin pie filling
3/4 cup granulated sugar
1/2 tsp table salt
1 tsp ground cinnamon
1/2 tsp ground ginger
1/4 tsp ground cloves
1/8 tsp ground nutmeg (I like to add this but it is optional)
2 large eggs
1 can (15oz) Libby’s 100% pure pumpkin (Or any other brand you like)
1 can ( 12 fl oz) Carnation Evaporated Milk (Or any other brand you like)
- In a small bowl, mix together the sugar, salt, and spices.
- In a stand mixer (or a large bowl if you have a hand mixer) beat the eggs. Stir in pumpkin and the sugar-spice mixture.
- With your stand mixer on low, slowly pour in the evaporated milk. You may have to scrape down the sides with a rubber spatula.
MINI PUMPKIN PIES
- Preheat your oven to 425 degrees
- Now that you have your pie crust and pie filling made, it’s time to start making your mini pies. Roll out your dough onto a lightly floured surface. It is also a good idea to flour your rolling pin as well as dust the top of the dough with a little flour. Once you have the dough rolled out to your desired thickness, use a 4-5 inch diameter circle cookie cutter to cut out your crust. (You can also use a Tupperware container to cut the crust out.) I usually get 10 - 12 circles out at a time. Save your excess to repeat this process.
- Take a cupcake pan and spray with cooking spray. Lay you're cut out crusts into the cupcake pan. You may have to push the edges gently on the sides. Be careful not to break the crust as you push it down. It is best if the crust is above or flush with the top edge of the cups. This will keep your filling from getting under your crust or sticking to the pan.
- Once your cups are lined with your crust, use a 1/4 cup or a 1/3 cup measuring cup to pour in your filling. Fill each pie nearly to the top. The pie rises a little in the cooking process but settles back down once they are cooled.
- Place pies on the middle rack of a 425-degree oven for 15 minutes. Turn your oven down to 350 degrees and let them bake for 25-30 minutes. The crust should be golden brown.
- Take pies out and let cool on a wire rack for 10 - 15 minutes before taking them out of your pan (I use a butter knife to carefully take them out) and allow them to continue to cool on a wire rack for a few hours to let the pie filling set.
- Repeat the process to make about 24 mini pumpkin pies.
- Top with Whipped cream or the whipped cream cream cheese frosting below! Have fun and sprinkle with cinnamon or pecan pieces!
Whipped Cream- Cheese Frosting
16 oz Cream cheese at room temperature
1 1/2 cups powdered sugar
1 tsp Vanilla
1 cup Heavy whipping cream
- Place your stand mixer bowl in your freezer for 15 - 20 minutes (or a medium-sized mixing bowl)
- Beat the cream cheese, powdered sugar, and vanilla until smooth in your stand mixer with your paddle attachment. Set aside.
- Take your bowl from the freezer and pour in your heavy whipping cream. Whip with your whisk attachment until nearly stiff peaks.
- Add your whipped cream mixture to your cheese mixture and mix on high until just combined.
- Place into a piping bag to pipe onto pies or just scoop out with a spoon.
***Store in the fridge in a covered container***
Jessica: "Mom's Dinner Rolls"
Dinner Roll Ingredients:
2 1/4 tsp yeast
2 Tbsp sugar
1 C warm water
1 egg
2 Tbsp butter, softened
3 cups flour, plus or minus
2 tsp salt
Instructions
- Mix the yeast, sugar, and water and let stand for 5 minutes to prove the yeast. Add the rest of the ingredients and mix.
- Knead the dough either by hand or in the mixer for 5-7 minutes to develop the gluten.
- Roll the dough into a ball and put into a greased bowl (spray pam is best) with a damp towel over it to rise. Let rise for an hour.
- Take the dough out of the bowl and give it a few kneads.
- Separate dough into 20 balls and roll them around. Arrange in a greased pan and let rise under a damp towel for another 45 min to an hour.
- Once risen, bake for 17 minutes at 350 until lightly golden brown. Topping option: brush with butter and sprinkle with chopped rosemary and salt before baking for a flavor option!


[1].jpg)
sunwash-tech-with-customer.png)

